Edit → Color: The Two Round-Trip Workflows That Actually Work
By Ethan Mai — 20 years in post-production, built and ran a 70-person editorial facility.
Sending a locked cut to color sounds simple until the grade comes back and won’t sit on your timeline. After grading round-trips on a few hundred episodes, everything I do reduces to two workflows — one simple, one flexible — plus one preparation rule that decides whether the round-trip succeeds before you’ve sent anything.
(Format background — what XML carries and what it doesn’t: XML, EDL, AAF & OMF →.)
Route 1 — Send a flattened master (the simple one)
Best when the colorist doesn’t need to re-trim shots, and you want the fastest possible exchange.
- Organize the timeline first. Separate your layers cleanly: edit media, graphics/packaging, and subtitles on clearly distinct tracks. This matters because only the edit layer goes to color.
- Export one continuous MOV of the cut — that’s the grading master.
- Export a small MP4 alongside it as the colorist’s reference.
- The colorist brings the MOV into DaVinci Resolve and auto-detects the shot cuts, splitting the single file back into gradable shots.
- The grade comes back as one continuous graded MOV. You drop it onto a track above your edit media, below your graphics — and the show is graded.
Why this route works: no relinking, no media packaging, no XML translation risk. One file out, one file back.
Its limit: the colorist can only grade what’s baked into the MOV — no handles, no re-trims, shot boundaries only as clean as the auto-detection.
Route 2 — Send media + XML (the flexible one)
Best when the colorist needs real shots with real handles — room to trim, track, and work each clip properly.
- Lock and clean the timeline, then export an XML of the cut.
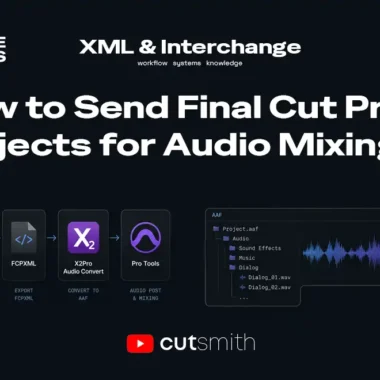
- Package every piece of media the timeline references and send it with the XML. (The XML is only decisions — if the media doesn’t travel, the colorist gets an offline timeline. That split is the core of the interchange overview →.)
- The colorist imports the XML into Resolve, relinks the media, and effectively rebuilds your project — then grades shot by shot.
- The return trip is graded clips plus a timeline (XML). You import that XML in your NLE, see the graded timeline, and copy the graded clips as a block onto a track above your original edit.
- Check it against the original, then move on to finishing.
Why this route is worth the extra packaging: every graded shot comes back with handles — extra media before and after each cut — so the edit can still breathe afterward. On Route 1 there are no handles; on Route 2 there are. That’s the whole trade.
The rule that decides the round-trip before you send anything
Strip transitions and “effect cuts” — flash frames, dissolves, fades — from the layer you send to color. They don’t survive the round-trip cleanly: a dissolve baked into a flattened MOV can’t be graded as two shots, and effect frames confuse shot detection and relinking alike.
What I actually do: duplicate the edit track, strip the transitions and effect cuts from the duplicate, and send that clean layer to color. When the grade comes back, I re-apply those transitions and effects onto the graded clips at the same cut points. The original track stays untouched as the reference for where everything goes.
It costs ten minutes before the handoff and saves the day after it.
Choosing between the two routes
| Route 1: Flattened MOV | Route 2: Media + XML | |
|---|---|---|
| Prep effort | Minimal | Must package all media |
| Relink risk | None | Real — media must travel |
| Colorist’s flexibility | Shot boundaries only | Full shots with handles |
| Return trip | One MOV, drop on top | Graded clips + XML, copy as block |
| Use when | Fast turnaround, locked shots | Grade needs room to work |
Common problems
- Graded return doesn’t line up with the cut → transitions/effect frames weren’t stripped before sending. (See the rule above.)
- Colorist reports everything offline (Route 2) → media didn’t travel with the XML, or paths broke. (See: Moving projects between NLEs →)
- Not sure which format carries what → (Start at: XML, EDL, AAF & OMF →)
Ethan Mai has spent 20 years in video post-production and now writes FreeVaults, an independent publication on editorial workflows and infrastructure. Notes and ongoing research: @EthanMaiBuilds.